Do you know what a baseball cap is? It's a cool and comfy hat that people wear on their heads. It's called a 'baseball cap' because it was first worn by baseball players, but now, everyone loves wearing them!
Baseball caps are usually made of fabric like cotton, and they have a flat top with a little bit of a curve. They have a special part in the front called a 'visor' that sticks out a little bit. The visor is great because it helps to keep the sun out of your eyes when you're playing outside.
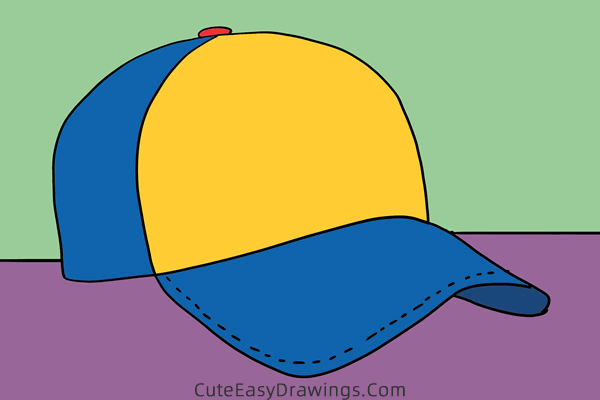
These hats come in all sorts of colors and designs. Some have cool logos or pictures on them, like your favorite sports team or cartoon character. You can even find ones with fun patterns or bright colors that make you stand out!
It keeps your head warm when it's a bit chilly outside and protects your face from the sun when it's shining brightly. Plus, it's easy to put on and take off, so you can wear it whenever you want. Let's follow the step by step instructions to learn how to draw a cap!
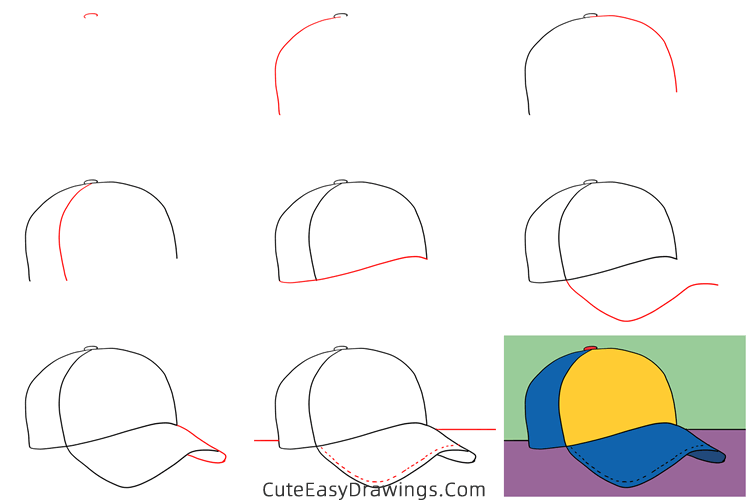
SUPPLIES NEEDED:
√ Draw a Cap PDF (Click to download for free.)
√ Drawing Papers (You can get it easily and I would say almost any paper can be used.)
√ Pencils / Markers / Crayons / Watercolors (Remember to use a pen with a fine tip when outlining.)
FOR WHOM:
Preschoolers and kids of all ages
TIME NEEDED:
Less than 0.5 hour
INSTRUCTIONS:
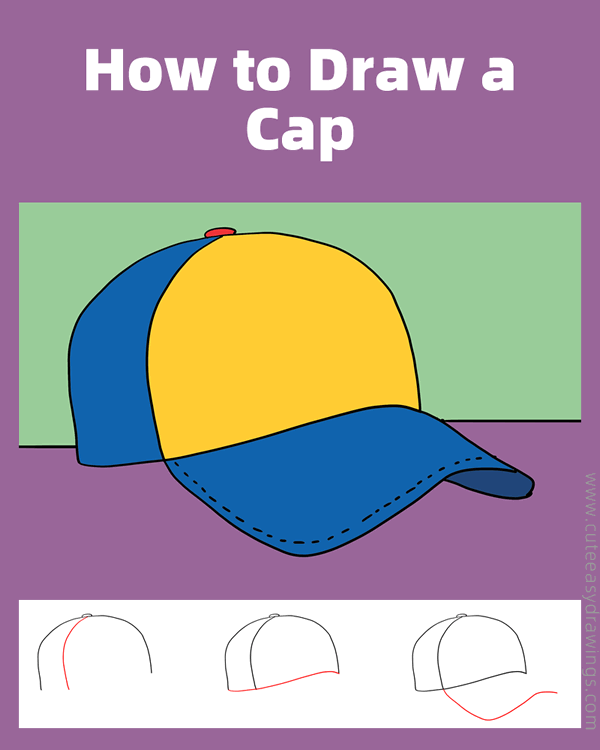
How to Draw a Cap Step by Step
Step 1 Draw the top of this cap.

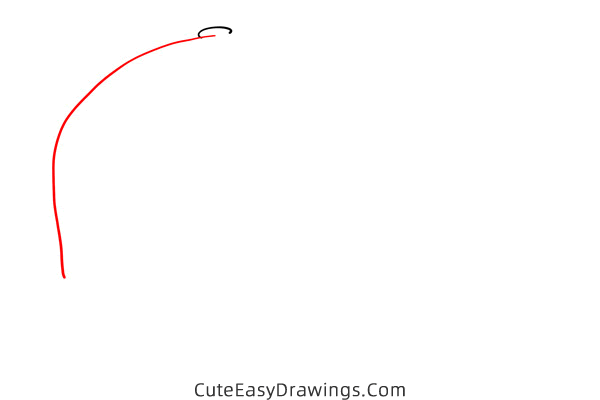
Step 2 Draw the left side of this cap.
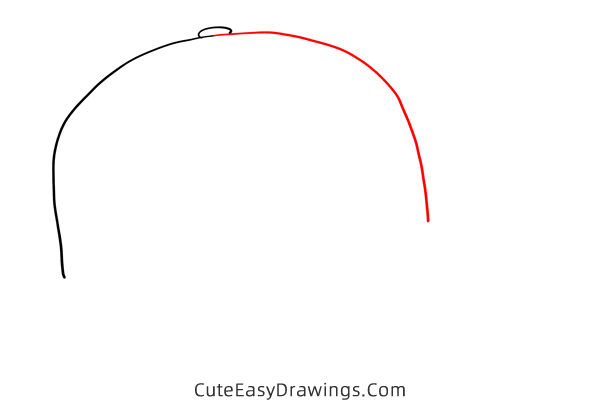
Step 3 Draw the right side of this cap.
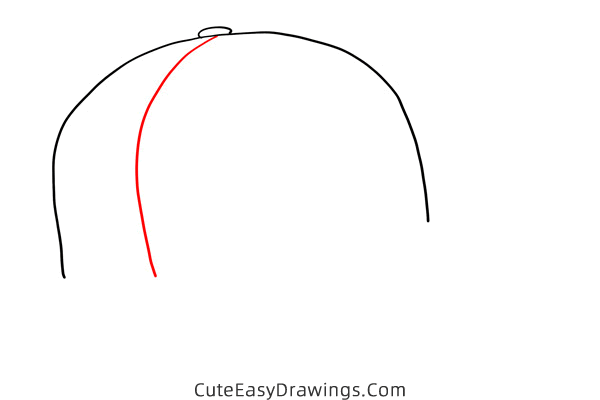
Step 4 Add a line to this cap.
Step 5 Draw the bottom of this cap.
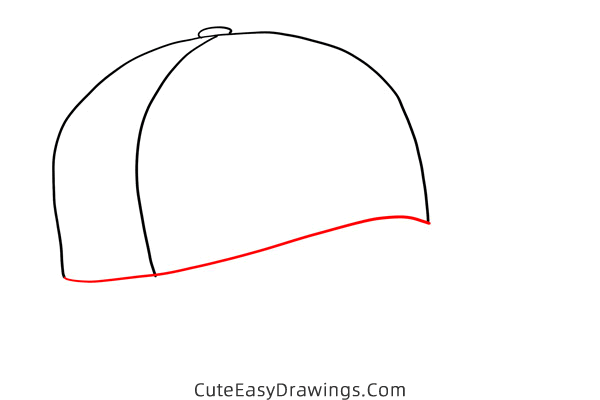
Step 6 Draw the brim of this cap.
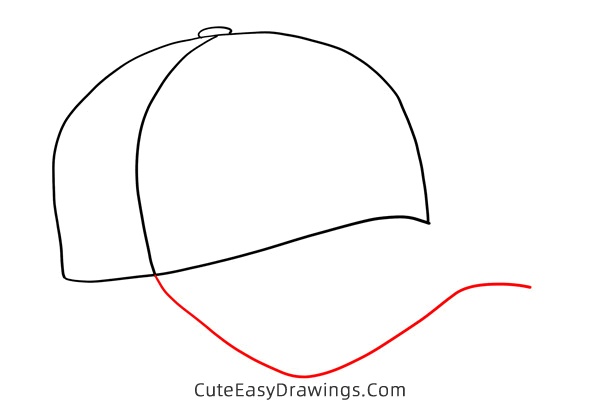
Step 7 Complete the brim of this cap.
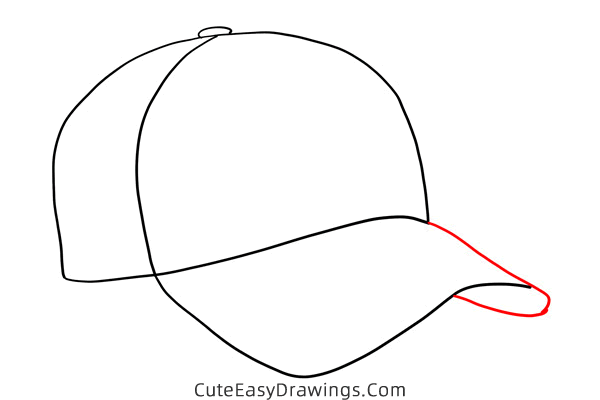
Step 8 Add dashed lines to the brim.
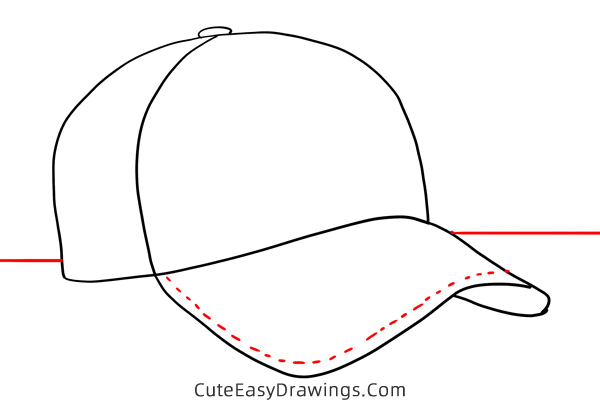
Step 9 Simply color this cap.

Guys, have you learned how to draw a cap yet?
 How to Draw a Pan Step by Step
 How to Draw a Lighter Step by Step
 How to Draw a Table Lamp Step by Step
 How to Draw a Robot Easy Step by Step