Evolving from the influence of 19th century Mexican culture, the cowboy hat traces its prototype back to the Mexican favorite, the Sombrero.
Later, in 1865, John Batterson Stetson designed and produced the prototype of the modern cowboy hat: the Boss of the Plains. Since then, this type of hat has been popular among cowboys because of its adaptability to the climate of the American West and its handsome and attractive appearance.
Three characteristics of cowboy hats are the tall hat, the wide brim and the decorative band on the hat. Many different types have been produced over the years.
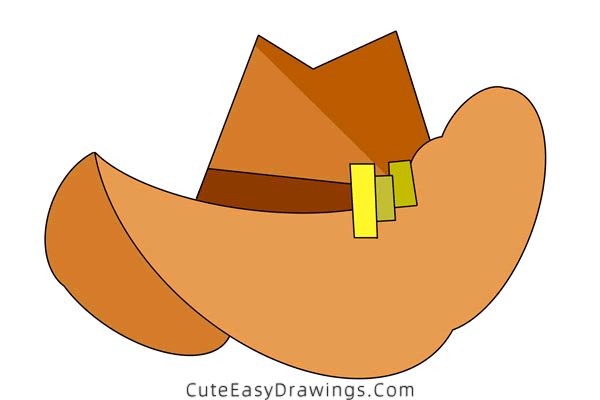
Now, cowboy hats have evolved from being exclusive to cowboys to a cultural symbol being chased and recreated by people all over the world. From time to time, cowboy hats will be a popular trend, on top of the runway or the cover of fashion magazines.
In today's drawing tutorial, we are going to learn how to draw a cowboy hat. It has a unique look and you will never mistake it with any other hat.
Cowboy hats symbolize pioneering, adventure and wildness, and whoever wears it will look so special! If you like it too, try drawing a cowboy hat by following the step-by-step instructions below.
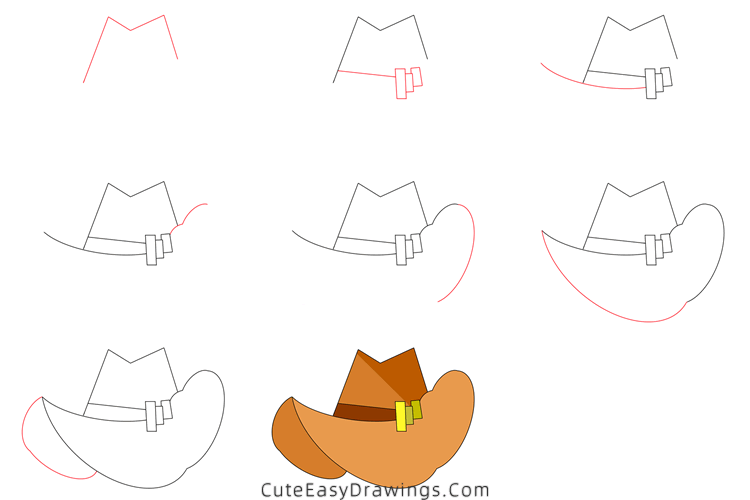
SUPPLIES NEEDED:
√ Draw a Cowboy Hat PDF (Click to download for free.)
√ Drawing Papers (You can get it easily and I would say almost any paper can be used.)
√ Pencils / Markers / Crayons / Watercolors (Remember to use a pen with a fine tip when outlining.)
FOR WHOM:
Preschoolers and kids of all ages
TIME NEEDED:
Less than 0.5 hour
INSTRUCTIONS:
How to Draw a Cowboy Hat Step by Step
Step 1 Outline this cowboy hat.
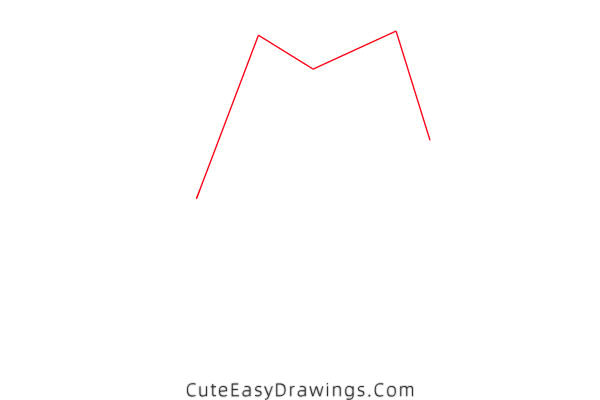
We're going to draw this nice cowboy hat in top-to-bottom order, which is more in line with what we're used to, don't you think?
Draw an "M" shape, with the leftmost line being the longest, and the four lines that make up the "M" shape are all straight lines.
Step 2 Add decoration to this hat.
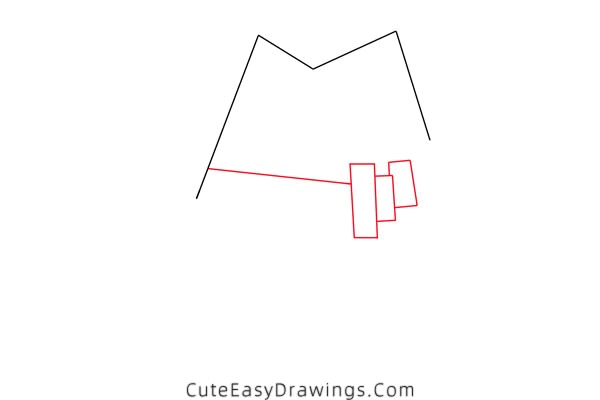
Next we're going to draw that decorative band on this cowboy hat, which consists of three small rectangles and a straight line.
We'll start by drawing three rectangles of different sizes that are close to each other. Then we'll draw a straight line to the left of them.
Step 3 The first step in drawing the brim.
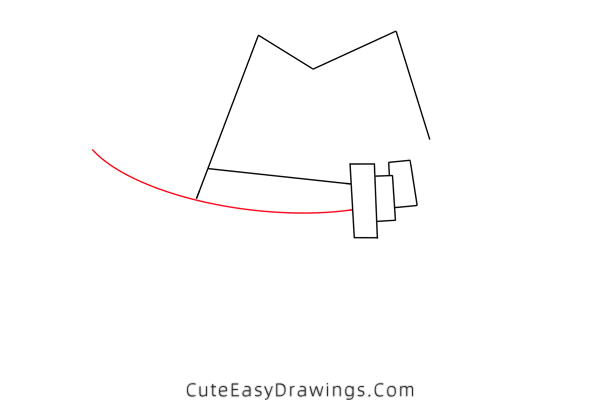
Next we're going to start drawing the brim of this cowboy hat. We'll go through it step by step in great detail so you don't have to worry about it at all.
Draw a smooth curve from left to right, passing through the bottom of a straight line to reach that rectangle on the far left.
Step 4 The second step in drawing this brim.
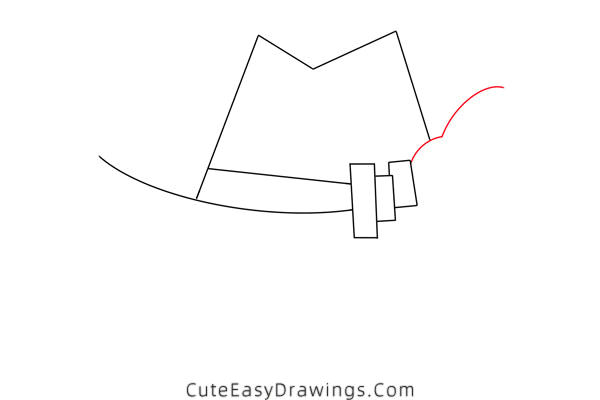
Let's look to the small rectangle on the far right. On its right edge, near the top, identify a good point.
From this point, draw a wavy line toward the top right, passing through the bottom of another straight line.
Step 5 The third step in drawing this brim.
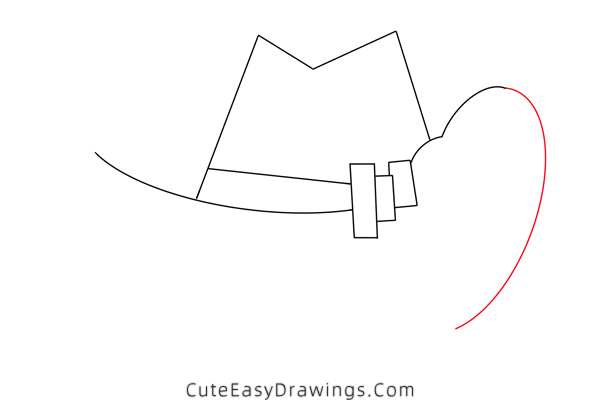
Without averting our eyes, let's still look at the wavy line drawn in the previous step. Draw a smooth curve down from its right end.
This curve should be sloping to the right, which means that its bottom end should be more to the left than its top end.
Step 6 The fourth step in drawing this brim.
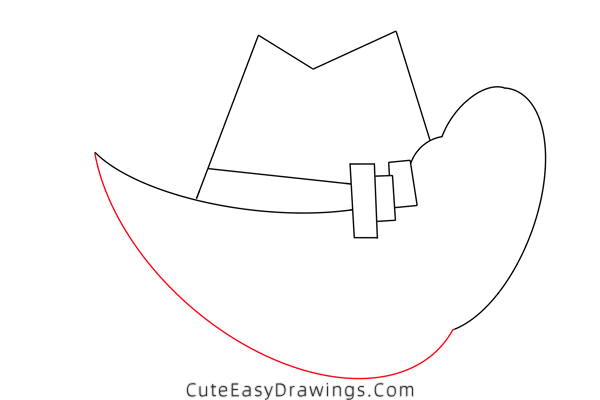
Let's look toward the curve we drew in the first step when we drew the brim of this cowboy hat.
Draw a smooth curve from the left end of this line toward the bottom right so that it joins the end of the line we drew in the previous step.
Step 7 The fifth step in drawing this brim.
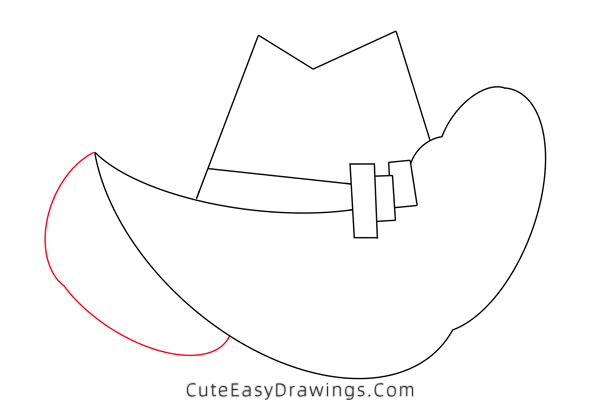
We are almost done with this cowboy hat through our previous efforts! In this step, you just need to draw one last line again.
Draw a line from the left end of this brim down to one edge of this brim. This cowboy hat is complete.
Step 8 Color this cowboy hat to complete it.

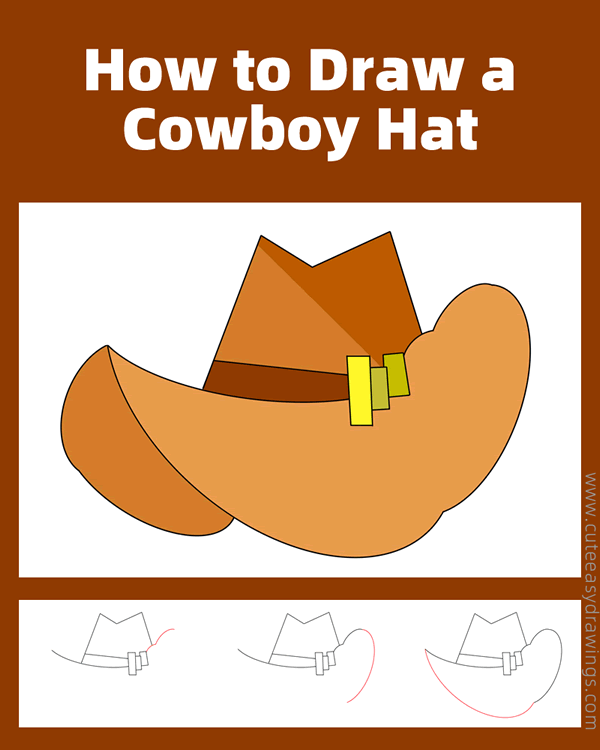
Lastly, it's time to color this great looking cowboy hat. You can refer to the picture above or you can finish it as you want.
You can also try to make a shading effect for this cowboy hat, you will never regret it! Well, now you can take it and show it off proudly!
Guys, have you learned how to draw a cowboy hat yet?
 How to Draw a Pan Step by Step
 How to Draw a Lighter Step by Step
 How to Draw a Table Lamp Step by Step
 How to Draw a Robot Easy Step by Step