The development of robots did not start in the modern world, and the creation of an automated machine that can work or serve us has been the common aspiration of every civilization in the world from ancient times to the present.
Robotics, one of the greatest inventions of mankind in the 20th century, has become an indispensable core equipment in manufacturing. Nearly one million industrial robots are working side by side with workers in the world.
In addition, there are humanoid robots, agricultural robots, service robots, underwater robots, medical robots, military robots and entertainment robots and other special robots for a variety of purposes have come out.
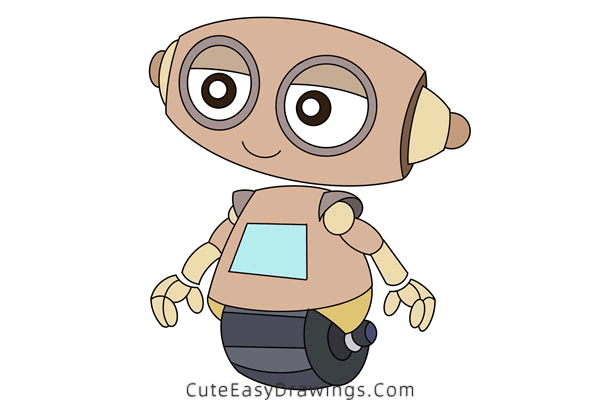
It is hoped that future robots will not only be able to understand what people say, but also be able to understand human emotions such as joy, anger, surprise, hesitation and ambiguity. All of these will bring great development space for the application of robots.
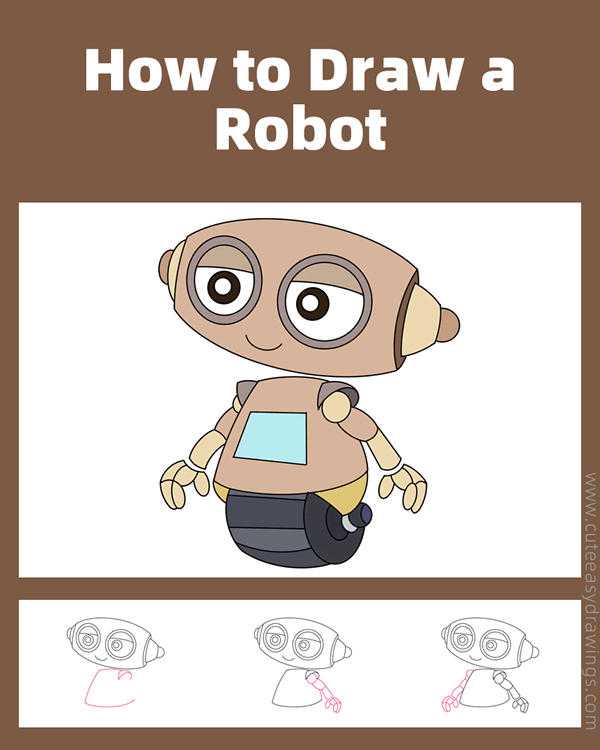
In today's drawing tutorial, we are going to learn how to draw a robot. It has a big brain and arms like humans and uses a wheel to move around.
As you may have noticed, the head and body of this robot are separate, so you can replace its head or body any way you want to get a unique robot!
SUPPLIES NEEDED:
√ Draw a Robot PDF (Click to download for free.)
√ Drawing Papers (You can get it easily and I would say almost any paper can be used.)
√ Pencils / Markers / Crayons / Watercolors (Remember to use a pen with a fine tip when outlining.)
FOR WHOM:
Elementary school students
TIME NEEDED:
About 1 hour
INSTRUCTIONS:
How to Draw a Robot Step by Step
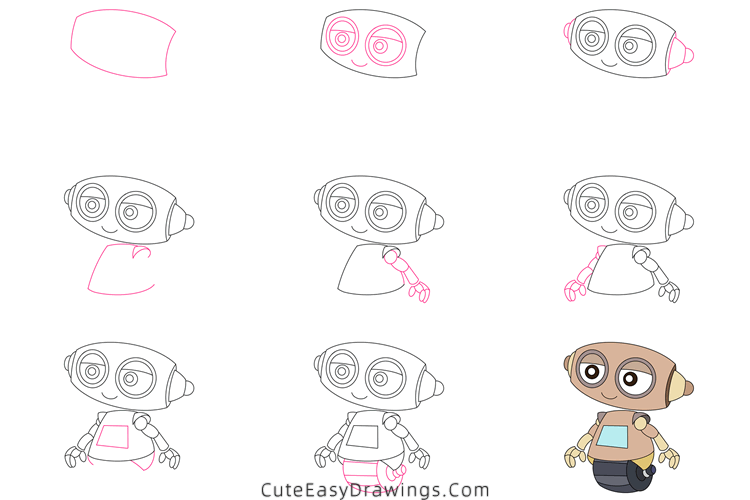
Step 1 Outline the head of this robot.
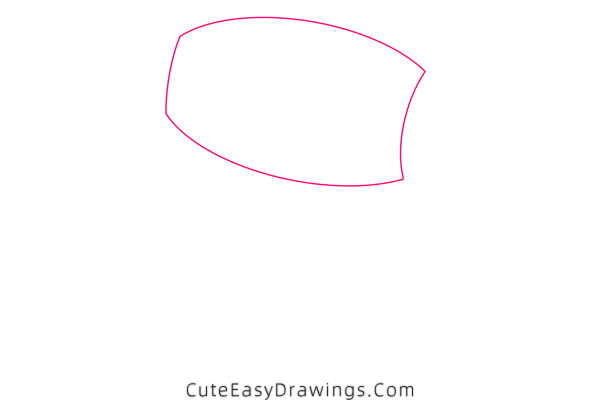
What shape is this robot's head? Kind of like an olive with the ends cut off. We don't often see robots with heads shaped like that!
And let's note that its head is turned sideways. So it looks like the left edge of this head is shorter.
Start by drawing the left edge of this head. Draw curves from its ends to the right, and then connect the right ends of these two curves with a line. We then get the outline of the head.
Step 2 Draw this robot's eyes and smile.
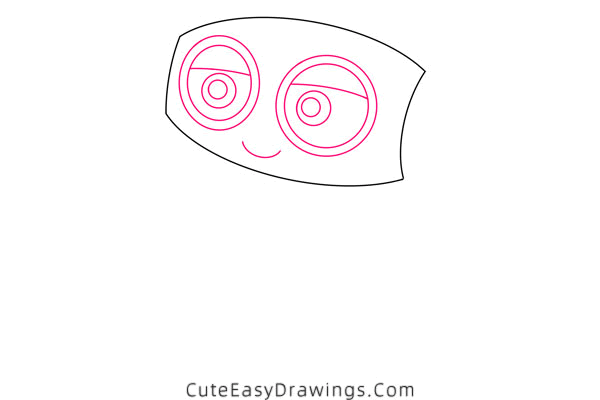
This robot's eyes are so large that they even take up almost the entire face. The eye on the left is slightly smaller and also closer to its corresponding edge.
Start by drawing a circle, then draw a slightly smaller circle inside it. After drawing a line inside, complete an eye by drawing two other circles below that line.
Follow a similar way to draw another large eye for this robot. Then below the eye, we draw a curve to form a valley to get a smile.
Step 3 Draw the ears of this robot.
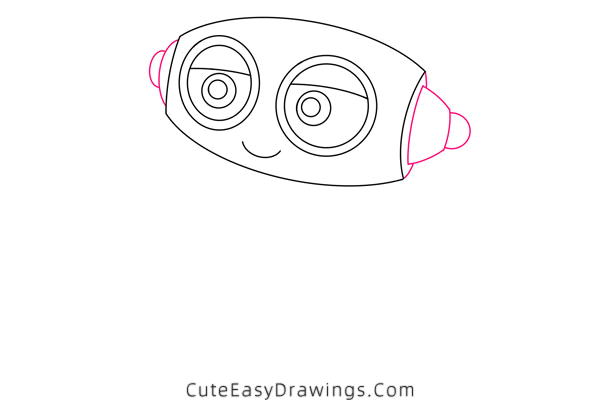
In this step we are going to draw the sides of the head of this robot, similar to the structure of the ears.
Start by drawing a curve on the left side of the head. Then draw another curve to the left of this line, thus completing the left ear of this robot.
On the right side of the head first draw a bowl-like shape. Then add a curve to the right side of it to complete this ear. Draw two short lines to connect this ear to the head.
Step 4 Outline the body of this robot.
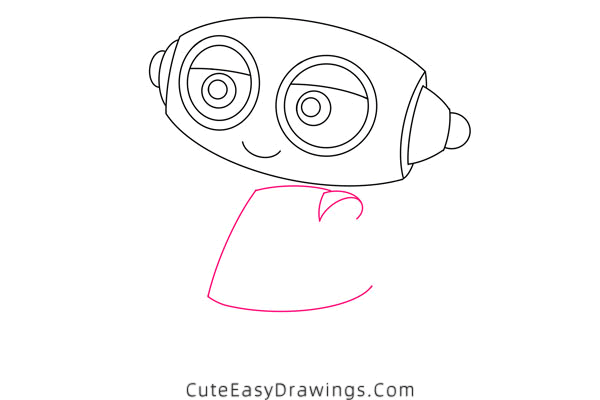
Below the head, we are going to draw the body of this robot. It is not necessary to connect the head to the body. Its body is going to be smaller than the head.
Below the head, draw a line from left to right. Draw a slightly longer line from its left end toward the bottom left. Then draw a smooth curve from the bottom end of this line you just got toward the right to get the outline of the body.
At the right end of the first line drawn in this step, we draw a sleeve-like structure, like one of the shoulder pads of an ancient knight.
Step 5 Draw one of the arms of this robot.
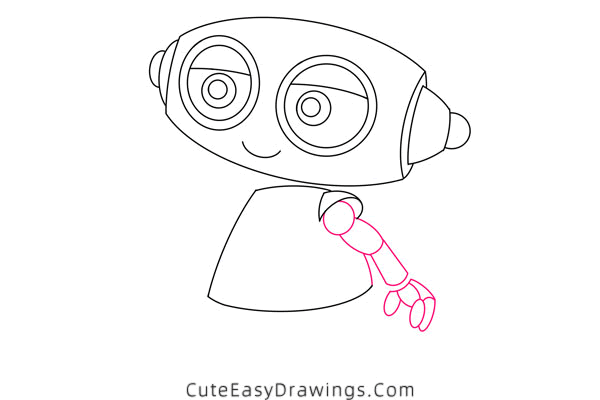
At the bottom of that sleeve-like shape we drew in the previous step, we start by drawing a circle. Then draw the two arm joints at the bottom of this circle.
After we have drawn this arm, let's try to draw a hand. There are only three fingers on this hand, or at least we can only see three fingers.
We don't need to draw the palm of the hand, just the three fingers, with each knuckle looking oval.
Step 6 Draw the other arm of this robot.
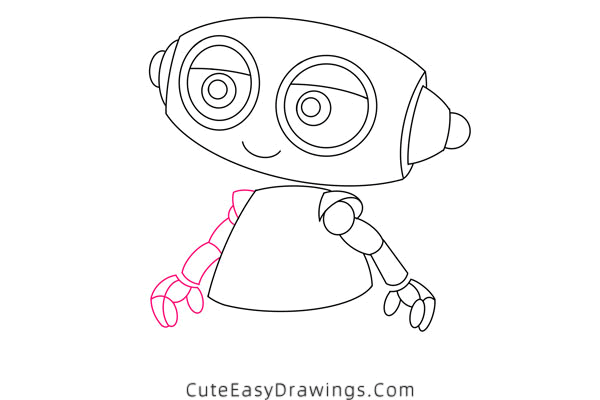
Next let's move on to the left arm of this robot. Again start by drawing a sleeve-like structure.
Then draw the three joints of this arm at its base. This arm looks shorter because it is on the back.
Below this arm we draw the other hand of this robot. This time we need to draw the palm of this hand.
Step 7 Add details to the body of this robot.
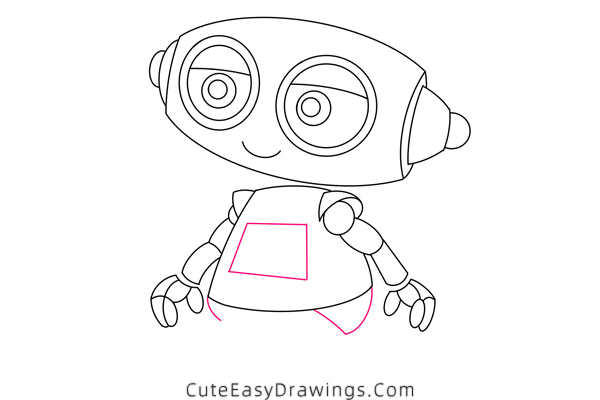
On the body of this robot, we're going to add a screen to it, like we often see in movies.
You can also try to add some buttons or messages, or emoticons, etc. to this screen, if you think it's cool enough.
At the bottom of the robot's body, we'll draw a curve on one side and then a shape close to a triangle on the other side.
Step 8 Draw a wheel for this robot.
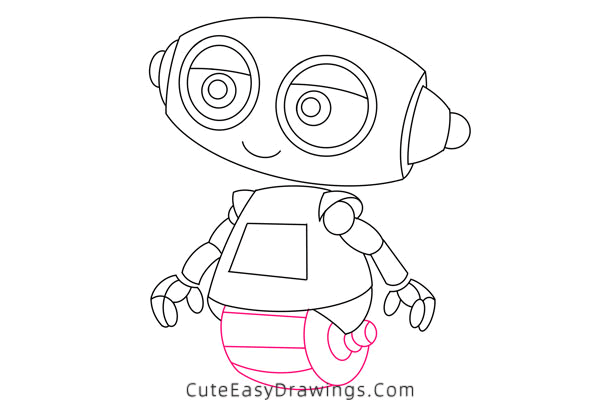
Finally let's add a wheel to this robot by which it moves. Of course, you can also replace this wheel with legs, as long as you don't find this too difficult.
We can start by drawing that bearing of this wheel, then draw one of the sides of this wheel and then finish the rest.
On this drawn thick wheel, we're going to add some lines from left to right, which gives this wheel a more three-dimensional and textured look.
Step 9 Color it to complete this robot.

Finally it's time for the coloring step, pick those colors you like and try to turn this cute robot into what you have in mind.
If you feel unsure, you can refer to the picture above to color this robot or just modify small details.
You can also try to draw shadow effects on this robot, or draw futuristic technological ground and buildings, and so on.
Guys, have you learned how to draw a robot yet?
 How to Draw a Pan Step by Step
 How to Draw a Ball of Yarn Step by Step
 How to Draw a Lighter Step by Step
 How to Draw a Rubik's Cube Step by Step