Guys, whenever you look up at the starry sky, are you filled with curiosity and longing for the mysterious universe? What is beyond the Earth? Are there aliens in space?
Human beings have long dreamed of traveling to space, and the vast universe has always been full of attraction and mystery to human beings.
Have you ever wanted to explore the universe? But do you know? If you want to go to the universe to explore, you need a very important means of transportation - rocket!
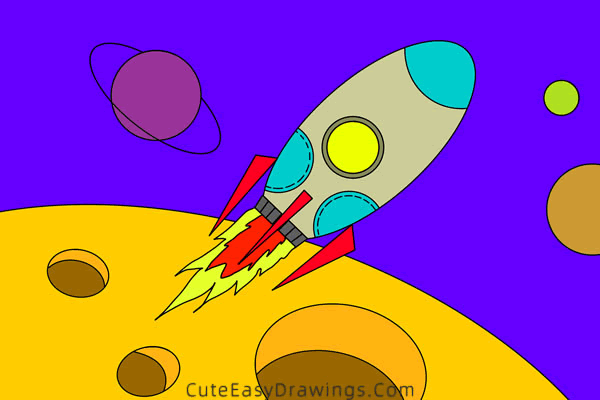
A rocket is a spacecraft capable of moving freely through space, and it works by utilizing the principle of reaction force to propel itself into motion by ejecting high-speed gases.
In today's drawing tutorial, we are going to learn how to draw a rocket flying into space. In addition to drawing a flying machine, we are going to draw the moon and planets in space as a background.
This is not a very difficult drawing tutorial, and we will do it in two parts - draw a rocket first, and then add the rest. If you like it, follow the instructions below and give it a try.
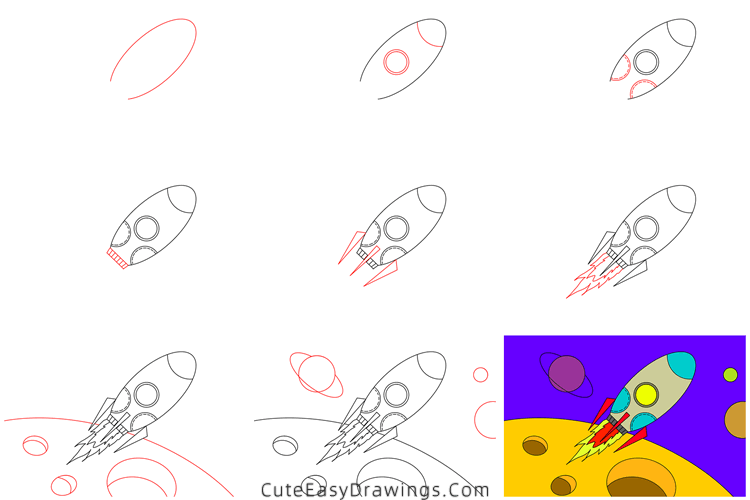
SUPPLIES NEEDED:
√ Draw a Rocket in Space PDF (Click to download for free.)
√ Drawing Papers (You can get it easily and I would say almost any paper can be used.)
√ Pencils / Markers / Crayons / Watercolors (Remember to use a pen with a fine tip when outlining.)
FOR WHOM:
Preschoolers and kids of all ages
TIME NEEDED:
About 1 hour
INSTRUCTIONS:
How to Draw a Rocket in Space Step by Step
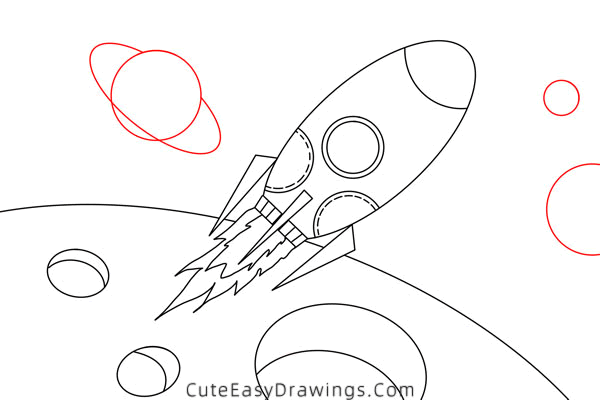
Step 1 Draw the outline of this rocket.
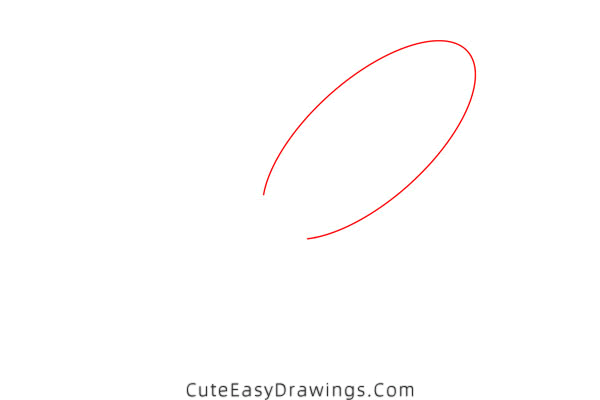
As we've already mentioned, instead of rushing to paint the background, let's focus on painting this rocket first.
You should have already noticed that this rocket is oval and tilted to the right. Let's not draw it too big or too small, taking into account its proportions to the background.
In addition, we want to leave a gap at the bottom of this oval where we will draw the bottom of this rocket in the subsequent steps.
Step 2 Add a window to this rocket.
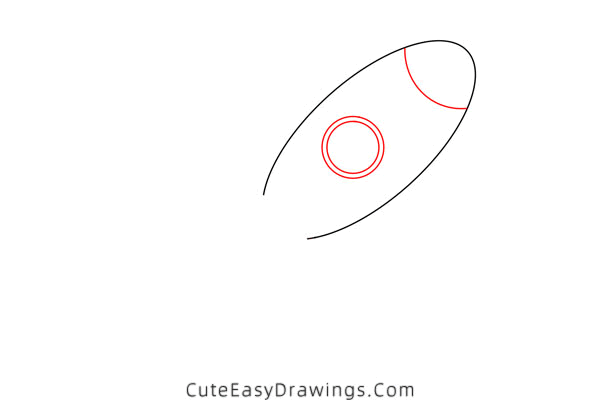
On the already drawn fuselage of this rocket, near the top, draw a smooth curve from the top left to the bottom right to get the nose of this rocket.
Draw a circle near the center of this rocket. Then draw a slightly smaller concentric circle inside this circle.
The only window we can see of this rocket is complete. You can of course add a few more windows to this rocket, it's no problem at all.
Step 3 Add details to this rocket.
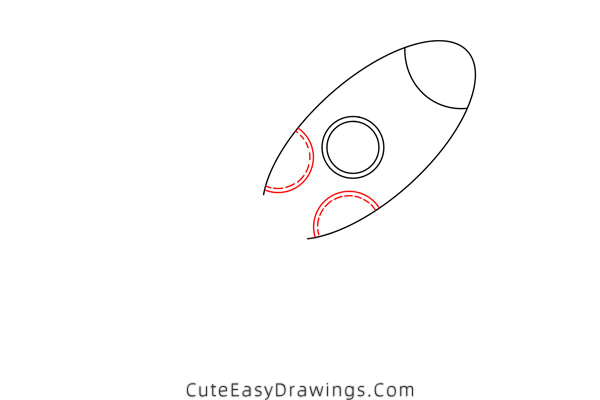
Below that window, we're going to add two circles as decoration that are symmetrical. You can also try switching to other shapes.
Draw a circle to the left of that window, but we don't have to make it complete so it looks like an arc. Along that arc, draw a dashed line inside of it.
Below that window, we'll similarly start by drawing an arc and draw another dashed line inside it.
Step 4 Draw the bottom of this rocket.
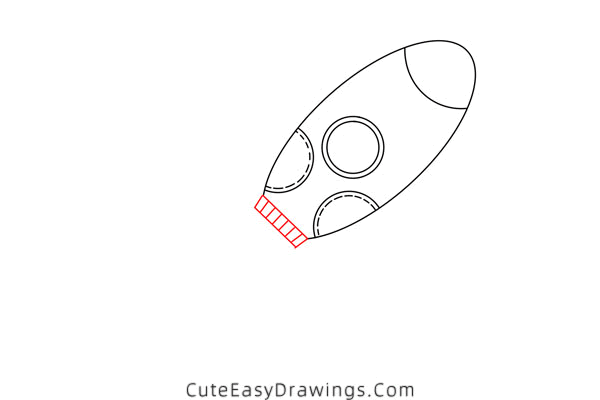
In this step, we'll start by drawing a line to connect the gap at the bottom of that fuselage.
From each of its ends, we have to draw a short line towards the bottom left. Then we'll use another line to connect the ends of those two short lines to get a trapezoid.
Inside this trapezoid, we add some lines with almost the same spacing between the two neighboring lines.
Step 5 Draw the tail of this rocket.
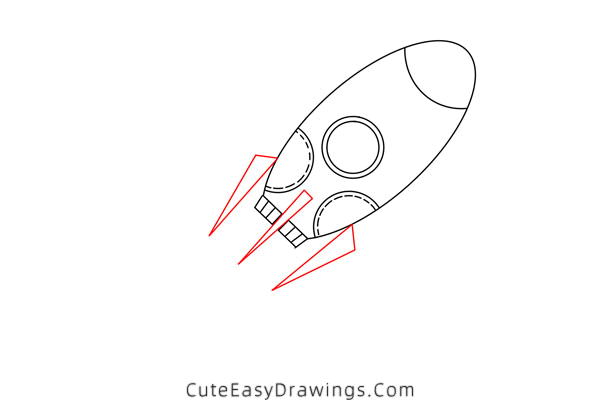
In this step we are going to draw the tail of this rocket, which consists of three triangles, where the left and right triangles are symmetrical.
Start by drawing the triangle on the left. You can start by drawing that short edge of it, then take a point at its lower left side and connect that point to the ends of that line.
Draw the other triangle on the right side in a similar way. Then between these two triangles we draw an isosceles triangle.
Step 6 Draw the flame at the end of this rocket.
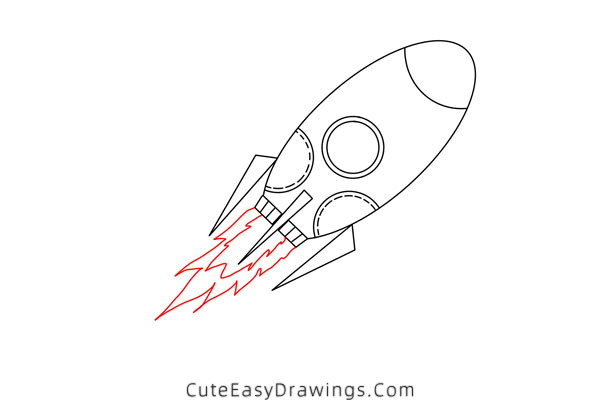
At the bottom of this rocket, we start by drawing the outline of the flame. It's almost as wide as the bottom of this rocket and almost half the length of the rocket.
Inside this flame, we draw the shape of a slightly smaller flame. This is the inner flame of this flame.
Okay, this rocket that is flying into space is done. Next, we also need to add a background to it, which you won't have any difficulty with!
Step 7 Draw our moon.
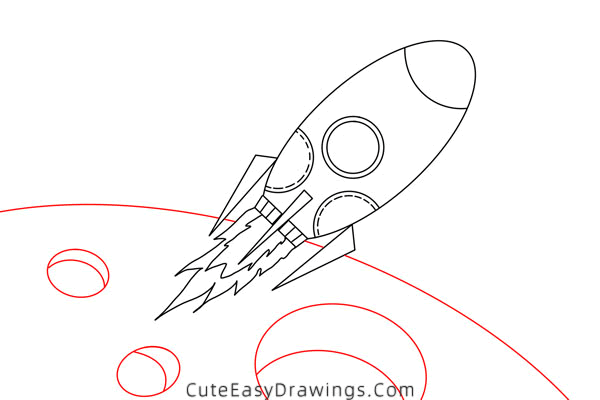
Draw a long curve from left to right down past the bottom of this rocket. This is the moon we see almost every day!
When we think of the moon, the first thing that probably comes to mind is that its surface is filled with craters. Let's add three craters to this moon as well!
Draw an oval and add a smooth curve inside it to get a crater. Draw the other two in a similar way.
Step 8 Draw the planets in space.
In space, of course, there are the planets in our solar system and even comets. Let's choose some to add to this picture.
Draw a circle to the left of this rocket and then an oval through it to complete a planet.
On the right side of this rocket, we draw two circles of different sizes to easily complete the other two planets.
Step 9 Finish by coloring it.

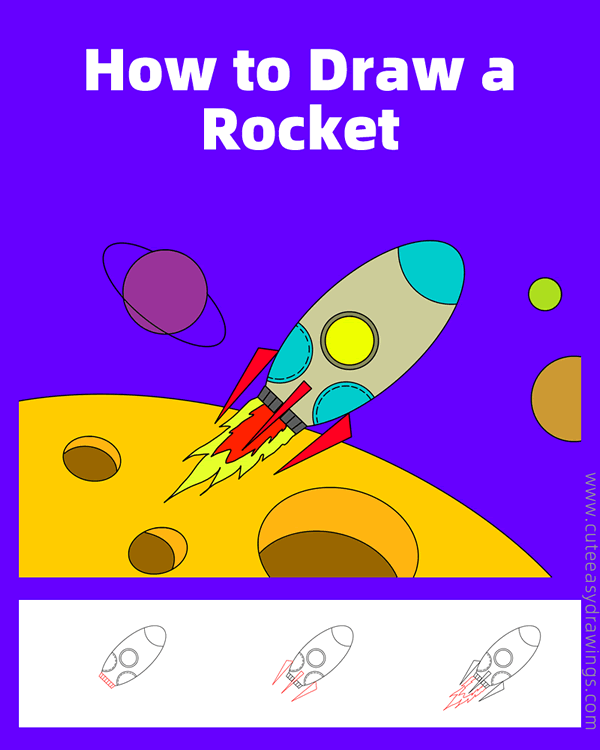
Guys, what does the universe look like in your mind? In this picture, you can color to your heart's content with those colors you like.
The dark color of space, maybe there are stars twinkling. Each crater consists of two colors and both are darker than the surface of the moon.
You can also carefully choose the colors to make our rocket cooler and more advanced. All this is up to you, come and try it out.
Guys, have you learned how to draw a rocket in space yet?
 How to Draw a Fighter Jet Step by Step
 How to Draw a Helicopter Step by Step
 How to Draw a Cruise Ship Step by Step
 How to Draw a Military Helicopter Step by Step