The alligator is an ancient reptile that looks like a lizard and is endangered. In the United States it is found mainly in Florida and Louisiana.
Alligators live mainly in fresh water, such as ponds, swamps, lakes and wetlands, and feed mainly on fish, small mammals and birds.
Most of the alligator's body color is dark, close to black, which is related to the environment they live in and serves to protect them. In addition, they have strong tails that can be used not only for swimming but also for defense.
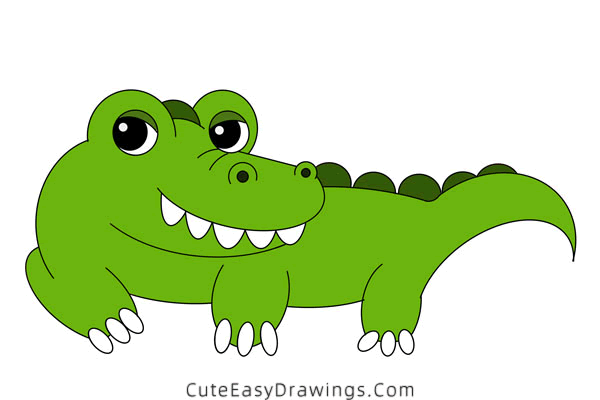
At one time, alligators, like dinosaurs, used to dominate the earth. Later, as the environment changed, many reptiles such as dinosaurs became extinct, while alligators and other reptiles were spared.
In today's drawing tutorial, we are going to learn how to draw an alligator. Did you know that alligators dig burrows to escape danger and hibernate?
They mainly hunt small animals that can be eaten in one bite. But there are examples of larger alligators killing Florida panthers and bears!
SUPPLIES NEEDED:
√ Draw an Alligator PDF (Click to download for free.)
√ Drawing Papers (You can get it easily and I would say almost any paper can be used.)
√ Pencils / Markers / Crayons / Watercolors (Remember to use a pen with a fine tip when outlining.)
FOR WHOM:
Preschoolers and kids of all ages
TIME NEEDED:
About 0.5 hour
INSTRUCTIONS:
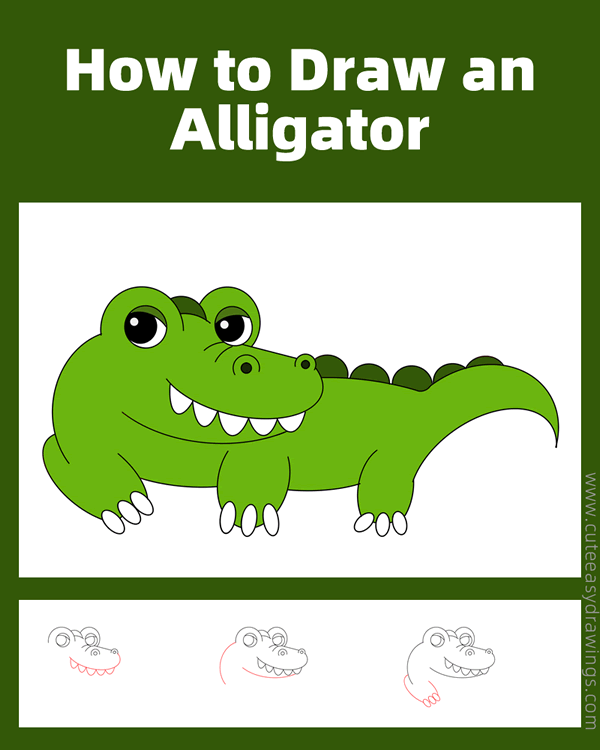
How to Draw an Alligator Step by Step
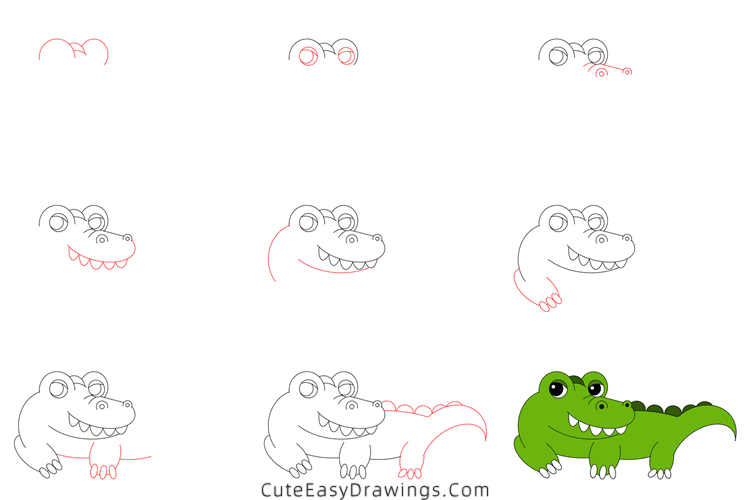
Step 1 Draw the top of this alligator's head.
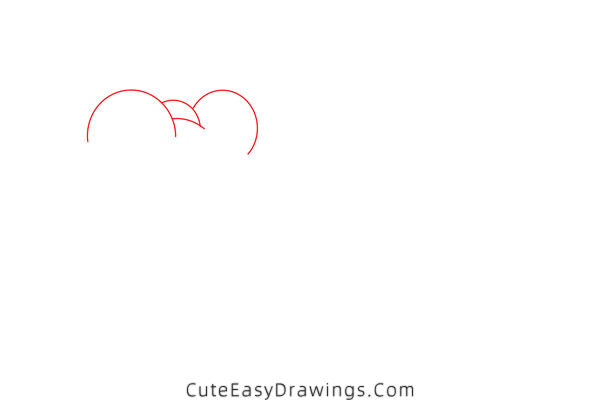
When drawing this alligator, we will start by drawing its head, followed by its body, limbs and tail. In this step, we will draw the top of its head first.
Let's start by drawing this semi-circular arc on the left. Then start on its right side and draw two curves towards the bottom right.
Similarly, let's draw that semi-circular arc on the right with reference to the picture above. In the next step, we will draw the eyes of this alligator inside these two arcs.
Step 2 Draw the eyes of this alligator.
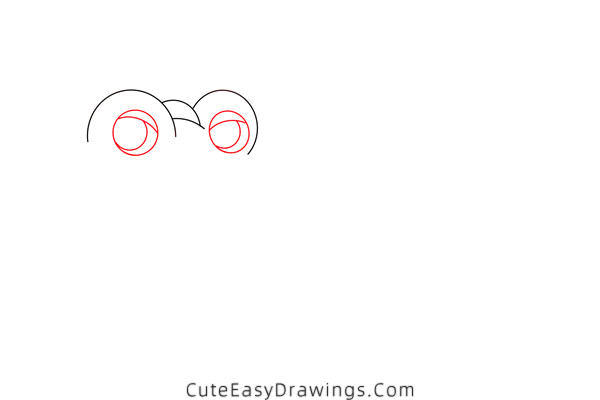
Before drawing the eyes of this alligator, you need to look at it and you will realize that its eyes are not quite the same as those of any other common animal.
Draw a circle inside that arc on the left. Inside that circle draw a curve from left to right. Draw another arc from this curve toward the lower left.
This way we have drawn an eye. In a similar way, we will draw the other eye of this alligator. Just by looking at the eyes, we can already sense the danger of this alligator!
Step 3 Draw the nose of this alligator.
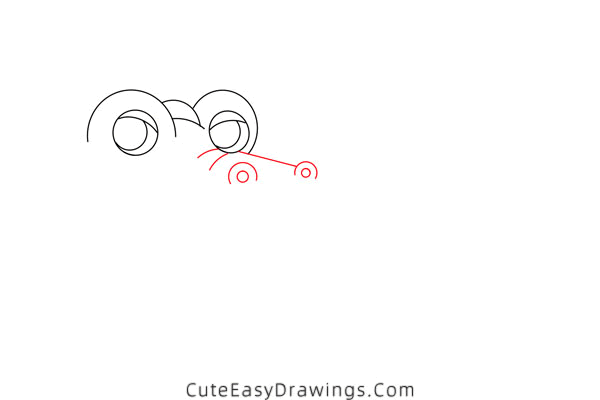
Let's look to the right eye of this alligator. Draw a straight line from the bottom of it toward the bottom right. Draw a circular arc at the end of this line and add a small circle inside this arc.
To the left of that nostril already drawn, slightly lower in height, draw another arc. Then draw a small circle inside it as well.
Looking again at that eye on the right, draw two curves from its base toward the lower left. This alligator's nose is complete.
Step 4 Draw the mouth of this alligator.
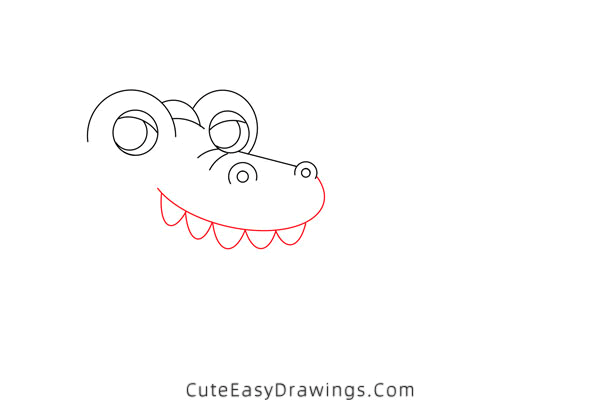
In this step we are going to draw the mouth of this alligator, in fact we only need to draw its upper jaw, its lower jaw is blocked by the teeth, we do not need to pay attention to it.
Find a point below the eye on the left, draw a curve from this point towards the bottom right, and then extend it towards the top right to reach the nostril on the right.
At the bottom of the curve just drawn, draw a wavy line along it to get the teeth of this alligator.
Step 5 Draw the chin of this alligator.
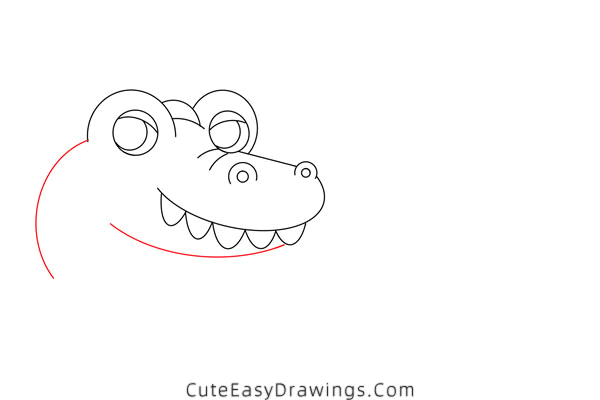
Still find a point below that eye on the left, which is further to the left and lower in position than the one you found in the previous step.
From this point, draw a smooth curve to the right to reach the bottom of that tooth on the far right. This way we have drawn the chin of this alligator and at the same time completed its mouth.
Let's look toward the first arc we drew back in step one. Draw a smooth curve down from its left end. This alligator's head is complete.
Step 6 Draw one leg of this alligator.
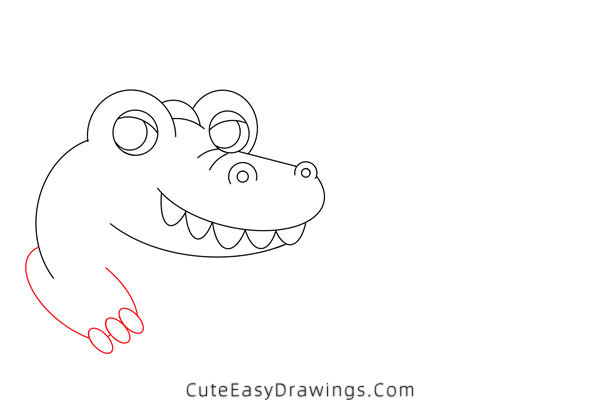
For this alligator, we only need to draw its three legs, and the last leg is hidden on the back of the body, which we don't need to bother with.
In this step we will draw a front leg. By looking at it you can see that this leg is close to oval. You can start by drawing its outline and leaving those gaps that should be there.
At the gap at the bottom of this leg, we draw three small ovals as claws. In this way, we easily complete this leg by drawing four ovals.
Step 7 Draw one leg and the belly of this alligator.
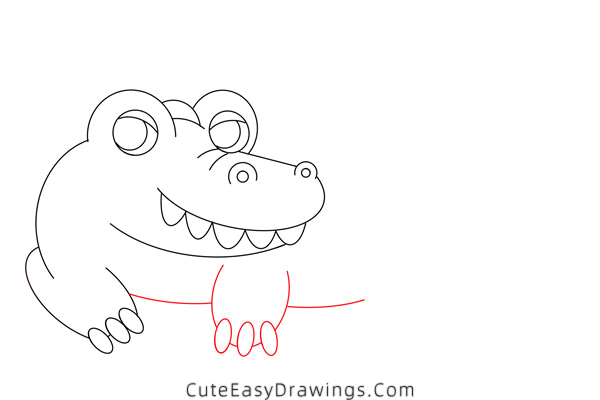
Again, we can easily draw another front leg. It is located below the mouth and we also start by drawing an oval and leaving gaps.
Draw three small ovals for claws in the three gaps at the bottom of this leg. The front legs of this alligator are finished.
Draw a curve from left to right connecting these two legs. Then start from the leg on the right and draw a curve to the right. This completes the drawing of its abdomen.
Step 8 Draw the back, leg and tail of this alligator.
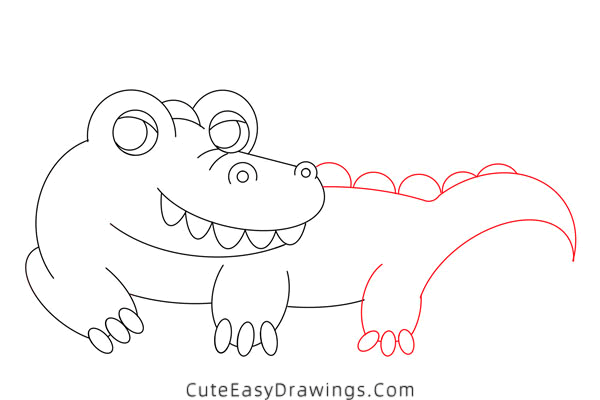
Starting at the mouth of this alligator, draw a curve to the right to get its back. There is no need to draw its back very long.
Then draw two curves to get the tail of this alligator. They are joined together at the right end. This is a good time to draw some arches on the top of the back and tail.
Finally, let's draw a leg between the belly and the tail of this alligator. This is one of its back legs.
Step 9 Color it to complete this alligator.

We've painted this adorable alligator, and it's time to color it to make it more realistic and alive! Trust me, it's easy and you'll love the experience.
Do you know what colors alligators come in? You probably already know this from books or videos, so choose the colors that make sense to you and color it.
If you still have some energy left, you can try to draw the environment where this alligator lives, such as a river, wetland, etc. You can also add trees and sky.
Guys, have you learned how to draw an alligator yet?
 How to Draw a Cat Step by Step
 How to Draw a Siamese Cat Step by Step
 How to Draw a Capybara Easy Step by Step
 How to Draw a Mouse Step by Step
