Iron Man, also known as Tony Stark, is a Marvel Comics superhero. He was born in Long Island, New York, United States and graduated from the Massachusetts Institute of Technology with a degree in electrical engineering.
He took over the huge family business, Stark Industries, from his father and is an industrialist and arms manufacturer, known for his unique lifestyle with its ingenuity and genius inventions.
Before the kidnapping, Tony was a self-centered person who did not take care of others' feelings. Even though he acted like an egomaniac, he always did his best to protect his teammates.
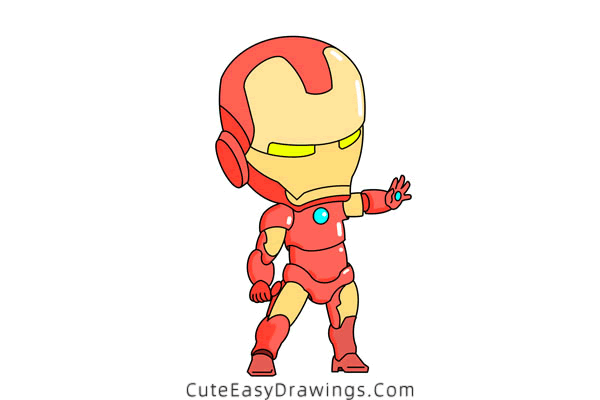
Iron Man Armor is an armor designed by Tony Stark. He designed many different kinds of armor with different functions, which gave Stark superhuman strength, superhuman endurance, the ability to fly and a variety of weapons.
In today's drawing tutorial, we are going to learn how to draw Iron Man. He's wearing a super cool armor of his own design, with one arm outstretched in front as if he's about to launch an attack.
We will complete him in order from top to bottom. As you must have already noticed, this Iron Man is cartoon-style with an unusually large head, and you need to keep that in mind.
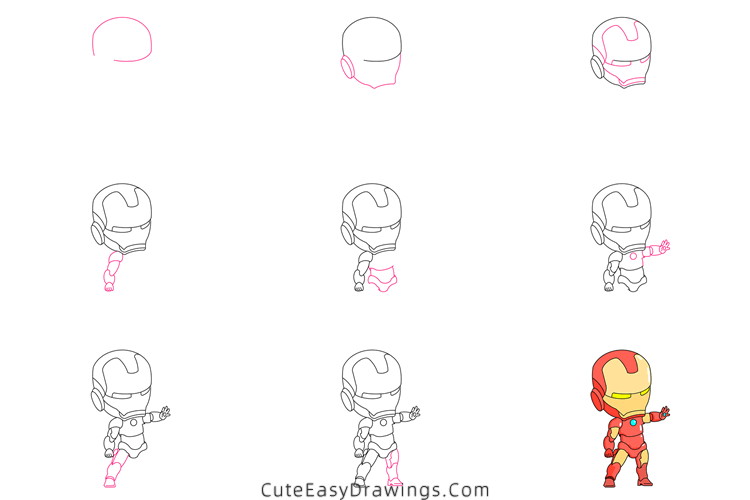
SUPPLIES NEEDED:
√ Draw Iron Man PDF (Click to download for free.)
√ Drawing Papers (You can get it easily and I would say almost any paper can be used.)
√ Pencils / Markers / Crayons / Watercolors (Remember to use a pen with a fine tip when outlining.)
FOR WHOM:
Elementary school students
TIME NEEDED:
About 1.5 hour
INSTRUCTIONS:
How to Draw Iron Man Step by Step
Step 1 Draw Iron Man's helmet.
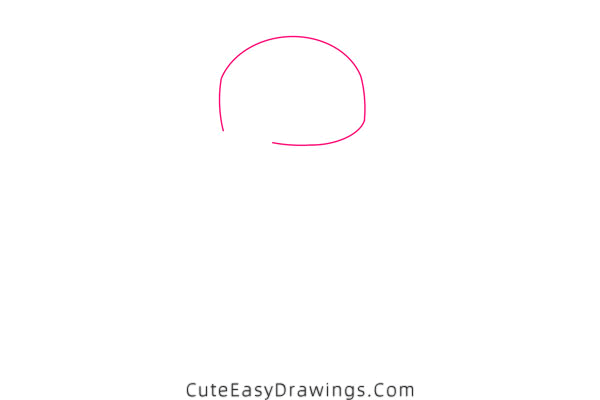
First, let's try to draw the outline of the upper part of the helmet, which looks like a hat - after all, a helmet can be considered a hat of some kind!
Draw a curve from left to right to create a valley. Draw a line down from each end of this line.
Below that valley, draw a line from left to right to connect the bottom of the right edge, leaving a gap.
Step 2 Outline Iron Man's helmet.
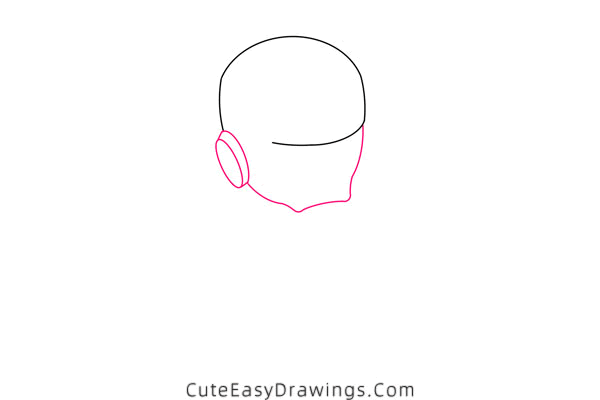
Next, let's try to draw the lower part of this helmet. It's going to be slightly more difficult than the previous step, so focus on that!
Start by drawing an ear-like structure located on the left side of this helmet. Draw an oval that slants to the left and a slightly larger incomplete oval to the right of it and connect them.
Draw a line from this "ear" towards the lower right, then the chin, and finally add the right side of the helmet.
Step 3 Add details to this helmet.
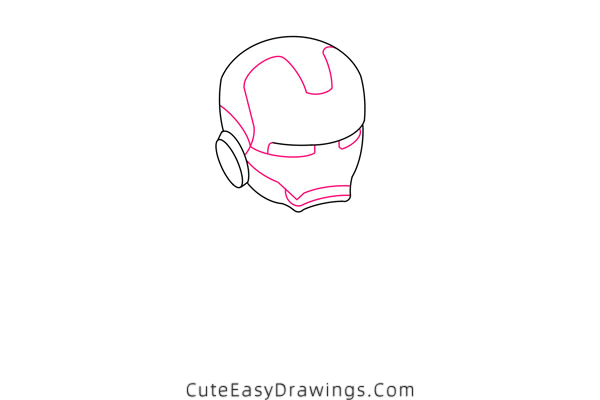
This step looks a bit complicated, and we can accomplish it by breaking it down into three parts: the forehead, the eyes and the mouth of this helmet.
Starting with that ear, complete the forehead part by drawing lines towards the top right to get two shapes resembling peaks and a valley.
Next, at the bottom of the line drawn at the end of the first step, draw two near-rectangular eyes and draw a line from the back of the head to reach the one on the left.
Still from that ear, draw a line toward the bottom right. Then finish the elongated mouth on this helmet.
Step 4 Draw one of Iron Man's arms.
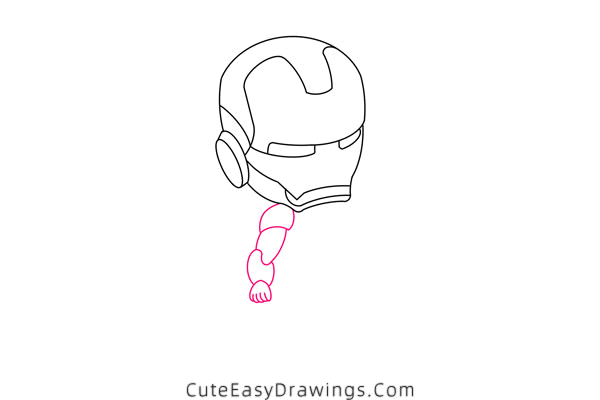
We've drawn Iron Man's head, next we'll draw an arm before we draw his body. His arm looks small compared to his head.
Let's look at Iron Man's chin and draw an arm from its left side towards the bottom left, no longer than the width of the helmet.
At the bottom of this arm a metal glove is to be drawn, with five fingers, very small and looking particularly cute!
Step 5 Draw the body of Iron Man.
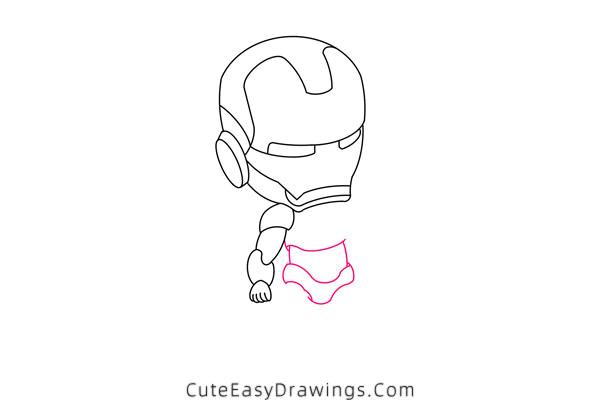
To the right of that arm already drawn, we can start drawing Iron Man's body. His body is about a quarter of the size of his head!
To the right of that arm, draw a line from left to right, noting its height. Then draw a panty-like shape underneath that line.
Draw two lines to connect that line to that panty shape, and a short line to connect that arm to the body.
Step 6 Draw Iron Man's other arm.
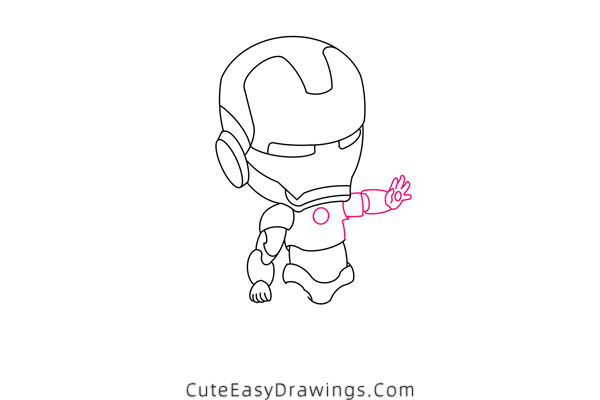
Draw Iron Man's other arm on the right side of his body. It is extended to the right and nearly horizontal. This arm looks shorter than the one on the left.
After drawing this arm, we draw the right side of Iron Man's body while connecting the body to this arm.
Let's look at Iron Man's chin and underneath it, draw a small circle on the body. Okay, Iron Man's body is also done!
Step 7 Draw one of Iron Man's legs.
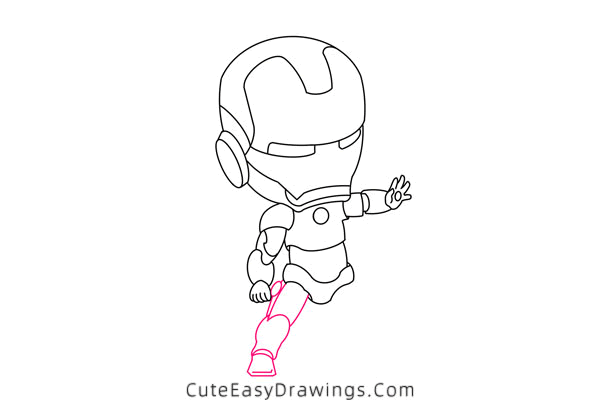
At the bottom of the body, we'll first try to draw the leg on the left. It's close to the length of the left arm.
You need to notice that this leg tapers from top to bottom and that the bottom of the foot is horizontal.
And overall, this leg is going to be thicker than the arm; you never want to draw a leg that's thinner than the arm, it will look less coordinated.
Step 8 Draw Iron Man's other leg.
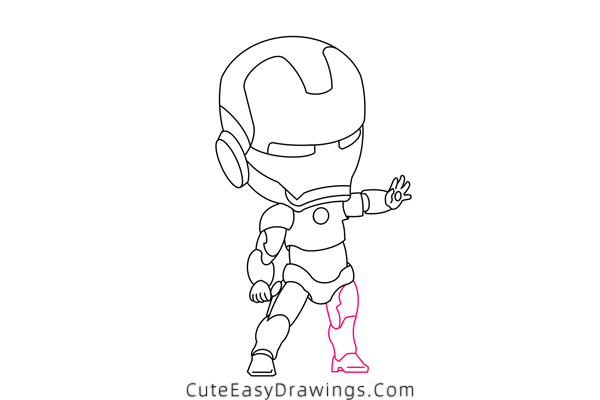
To the right of the already drawn leg, we draw the other leg of Iron Man. It is about the same length as the other leg.
This leg also tapers from top to bottom and the bottom of the shoe is horizontal.
Also, since this leg is farther away from us, its bottom looks slightly higher than the bottom of the other leg.
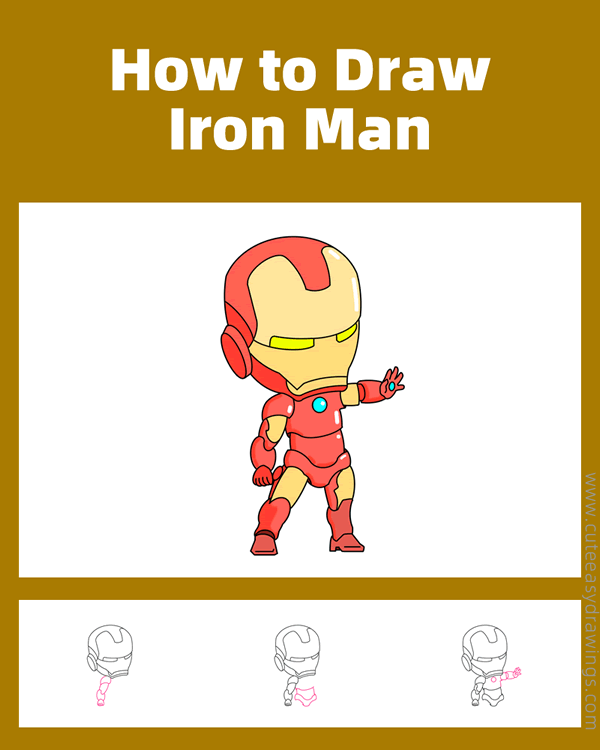
Step 9 Color this cute Iron Man.

Iron Man's armor started out gray, but Stark realized that this appearance would cause panic among the public, so he repainted the armor gold.
After that, the color of Iron Man's armor was changed to red and gold, and this look became the basic style of Iron Man from then on.
In addition, Iron Man's armor also appeared in gold and silver. Guys you can decide for yourself and pick your favorite colors to color him!
Guys, have you learned how to draw Iron Man yet?
 How to Draw Nemo Step by Step
 How to Draw Monkey D. Luffy Step by Step
 How to Draw Stitch Easy Step by Step
 How to Draw Pikachu Step by Step